The gallery wall: compose on the floor first
Before drilling, compose on the parquet to visualise
A successful gallery wall is prepared on the floor. Composing directly on the wall means a thousand unnecessary holes and regrets.

How do you arrange a gallery wall without drilling at random?
Never drill before composing on the floor. Lay your 5 to 11 artworks down, live with the layout for a few hours, then cut paper templates to the exact frame sizes. Tape them to the wall, live with it 48 hours, and drill only once validated.
§ 01The principle
A gallery wall (several framed artworks in asymmetric composition on the same wall) is one of the most effective solutions for dressing a large bare wall. But it is also one of the riskiest if you improvise.
The professional rule: never drill the wall before having composed on the floor. This prior composition step is what distinguishes a successful gallery wall from a failed one.
Three successive steps. Step 1: compose on the floor. Lay all the artworks on the floor in the intended arrangement, and live with it for a few hours. Modify and reposition until the composition satisfies you. Step 2: create paper templates. For each artwork, cut a rectangle of newspaper to the exact frame dimensions. Mark the position of the hanging point. Step 3: hang the templates on the wall. With masking tape, fix all templates on the wall in the final arrangement. Live with it for 24-48 hours. Only then: drill and hang the real artworks.
To apply this rule: See selectionAffiliate

Compose on floor · Paper templates · Live 48 hours · Then drill
One hour of preparation saves ten hours of regret.
§ 02Putting it into practice
Gather the artworks. 5 to 11 artworks for a typical gallery wall. Mix formats (horizontal, vertical, square), frame materials (wood, metal, passepartout), and contents (black and white photos, paintings, prints, posters).
Three composition principles. One strong artwork at the centre of gravity (not necessarily the geometric middle, but as visual anchor: often the largest, most colourful, or most meaningful). A controlled asymmetry (no mirror symmetry, but an overall balance of visual masses). An invisible grid (spaces between artworks stay regular, 5-10 cm, the eye seeks this regularity even without consciously seeing it).
Creating templates. On newspaper or kraft paper, draw the outline of each frame to exact dimensions. Mark an X for the position of the hanging point (usually 5-10 cm below the top of the frame, check the back of each artwork).
Living with the templates. Step back 3-4 metres, observe. Adjust if necessary. This step seems excessive; it is essential. The composition that seemed perfect last night may look unbalanced in the morning.
In small interiors. 5 or 7 frames are enough for a gallery wall. No need to aim for 11 if space is limited.
- 01Compose all artworks on the floor before anything else
- 02Create paper templates to exact dimensions
- 03Live 48 h with the templates hung up
- 04Drill only after visual validation
- 01Hanging the first artwork, then adjusting the others by feel
- 02Aligning all artworks in a single straight row
- 03Spacing randomly without an invisible grid
- 04Forcing eleven artworks into a space intended for five
§ 03Professional variations
Pierre Yovanovitch prepares his gallery walls several weeks before project delivery, with exact-size templates and photos of each artwork stuck on them. When the team hangs them, there is no longer any doubt.
Jean-Louis Deniot often mixes antique paintings (19th century) and contemporary photographs in the same gallery, with very different frames. Coherence comes from the subject (always portraits or landscapes, for example) rather than the format.
A fashionable variation: the monochrome gallery wall, where all artworks are in black and white, or all within the same restricted palette. Very strong, almost graphic effect.
One hour on the floor, and the gallery wall is saved.
---
For this rule
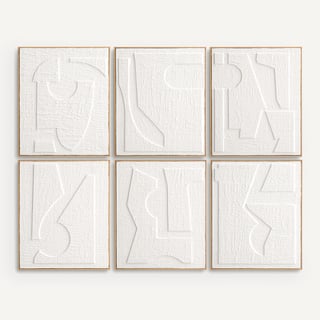 AM.PM Hekatos · set 6 cadres chênethe centerpieceSee
 INSPIRE Milo Case · duo cadres FSCthe accessible one, natural feelSee
 Cadre 40x60 bois massif FSC · Ceanothethe smart moveSee
- Desenio · affiches lignes minimalistesfor dressing framesSee
Affiliate links · See our transparency →
And in your room — is this rule respected?
Photograph your room. The AI checks it against all 114 rules of the manual and returns the concrete fixes to apply this weekend.
Audit my roomFree, no sign-up. Analysed in under a minute.
One measured rule, every Tuesday.
Good measurements are worth keeping. Get The Bulletin: one décor rule explained in depth, Tuesday morning. Four minutes, zero noise.